
3.1 Field Stripping (EP45)Updated 5 minutes ago
Regular cleaning and maintenance will ensure proper function and long life of your firearm. Before disassembling your pistol, unload and make absolutely certain that your pistol has been cleared, as described in the unloading instructions.
3.1.1 Verify your pistol is unloaded/clear and return the bolt into battery.
3.1.2 Partially push the rear take down pin from the left side so it is not captured by the detent that retains it in the receiver in the closed position. Do not attempt to drive it out with a punch. A bullet tip or other tool that will move it enough to grasp the head on the opposite side is proper procedure. (fig 4)
3.1.3 Pull the rear take down pin the rest of the way to the right side of the lower receiver until it engages the detent that holds the pin in the open position. (fig 5)
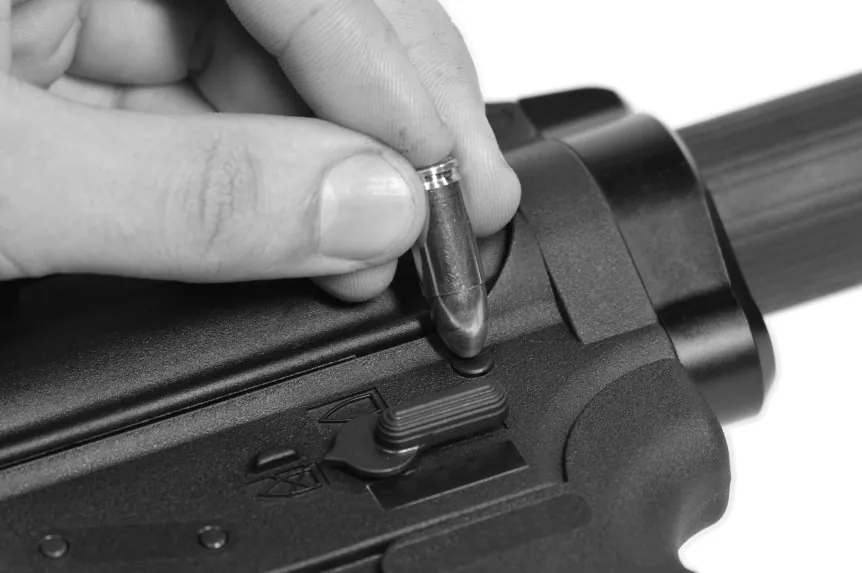 Figure 4
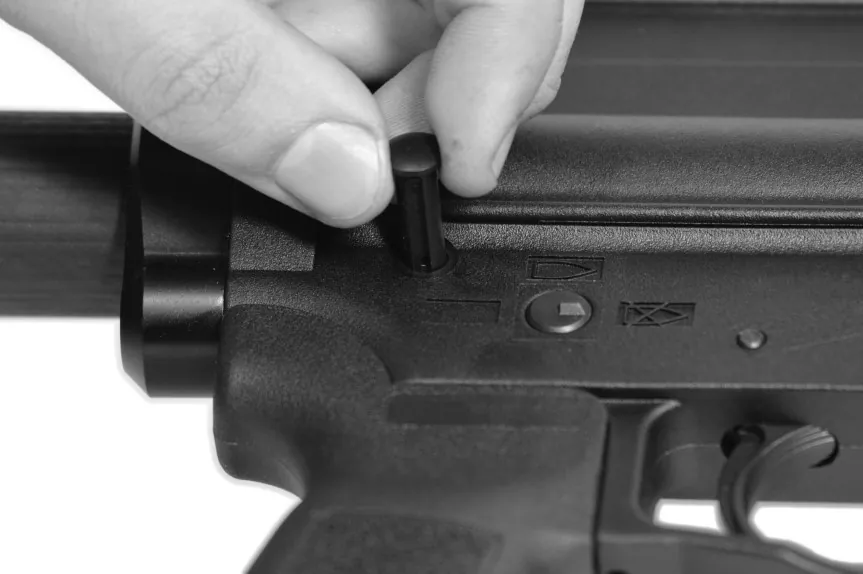 Figure 5
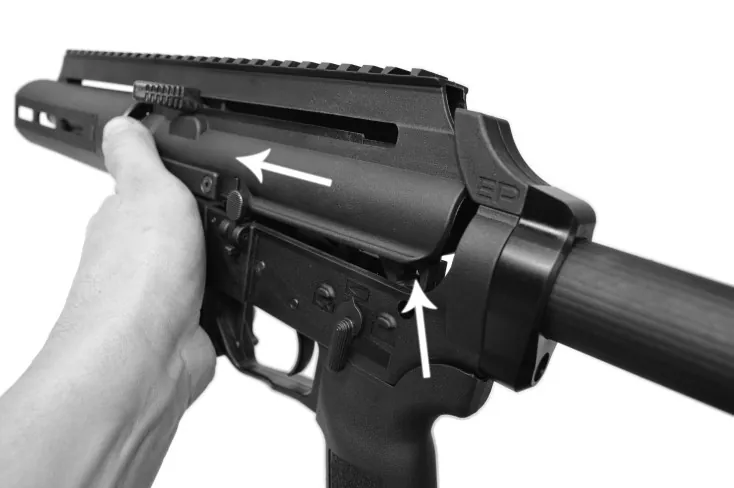 Figure 6
3.1.4 Grasp the front of the magazine well with a thumb up on the back of the hand guard retainer as shown in the illustration below. (fig6) Push the upper assembly forward with thumb until it lifts up in the back to a loose position and simultaneously disengages from the front retaining hook.
3.1.5 The upper and lower receiver groups are now separated; set the upper receiver group aside. PLEASE NOTE: The receiver extension cannot be removed or replaced.
3.1.6 Remove the buffer and action spring from the lower receiver by first depressing the buffer slightly into the lower receiver extension tube. While maintaining tension on the buffer face, the retaining plate that inserts into a slot in the lower receiver can now be lifted up or drop out. While removing, remember it will be under pressure from the action spring. (fig7) Holding the hammer depressed past the cocked position will allow the buffer and spring to be easily removed from receiver extension. (fig8)
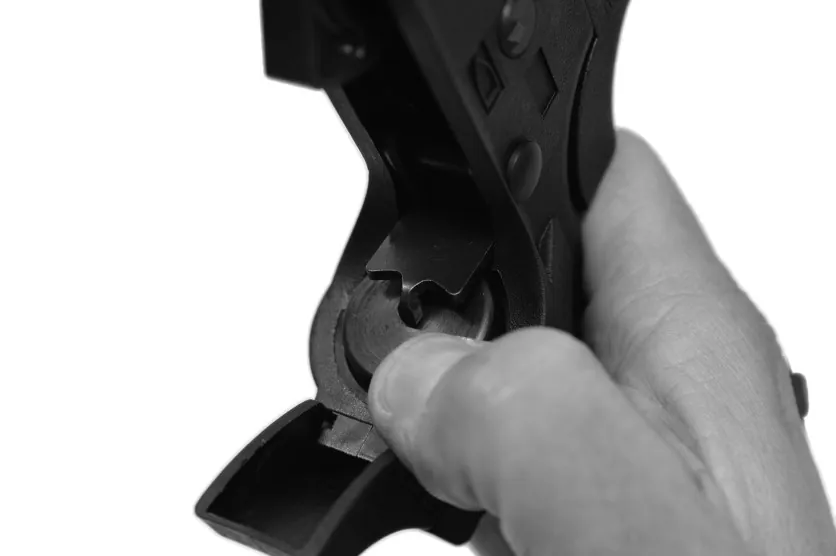 Figure 7
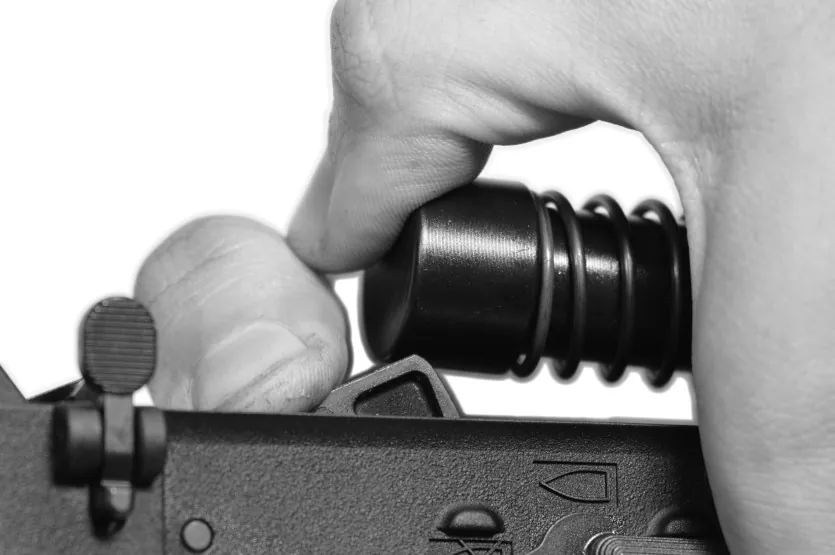 Figure 8
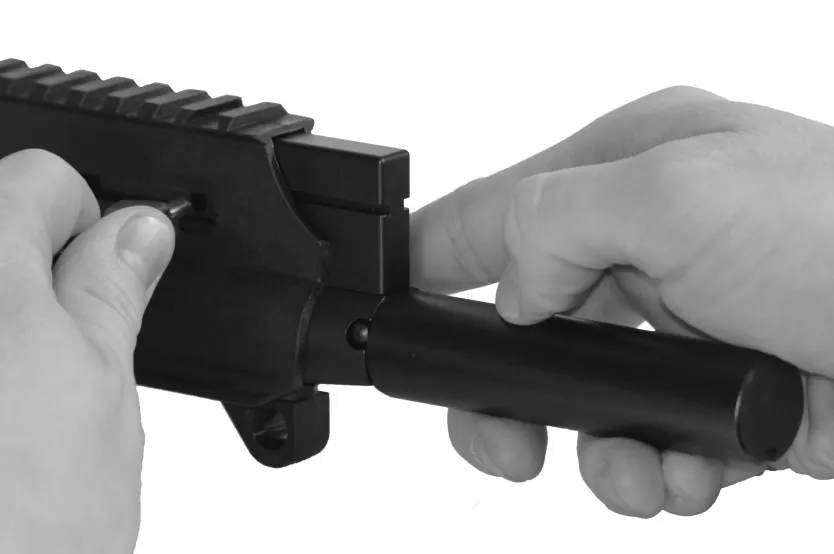 Figure 9
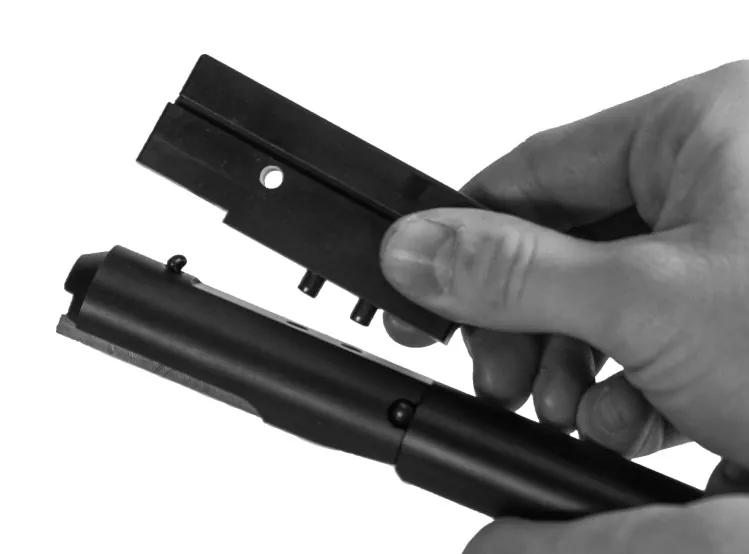 Figure 10
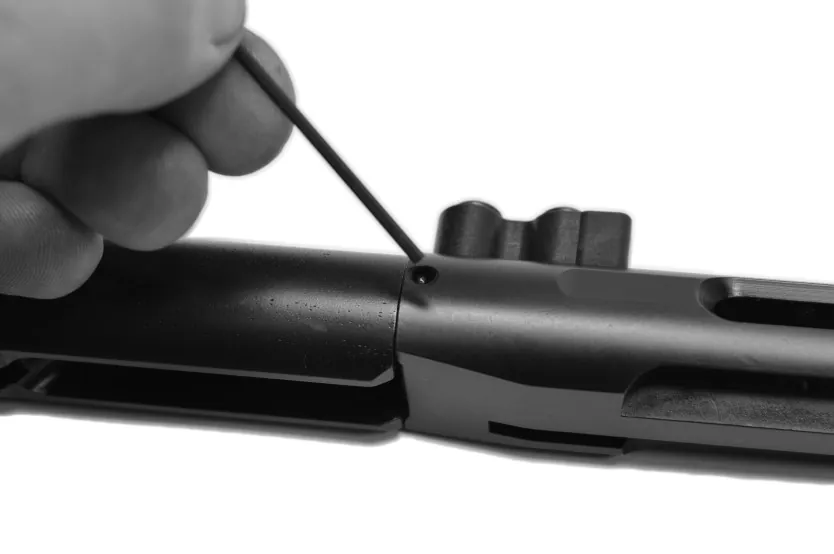 Figure 11
3.1.7 Set the lower receiver, buffer and recoil spring aside and pick the upper receiver back up.
3.1.8 Move the charging handle all of the way to the rear, and then pull the charging handle straight out. (fig9)
3.1.9 With the charging handle removed, pull the bolt straight out and then lift off the top portion of the bolt (the “key”) and set it to the side. (fig10)
3.1.10 Remove the firing pin retaining pin from the left side of the bolt carrier group. You may use a small tool to push out the firing pin retaining pin. (fig11) To further aid disassembly you may need to slightly depress the firing pin to relieve tension from the firing pin spring.
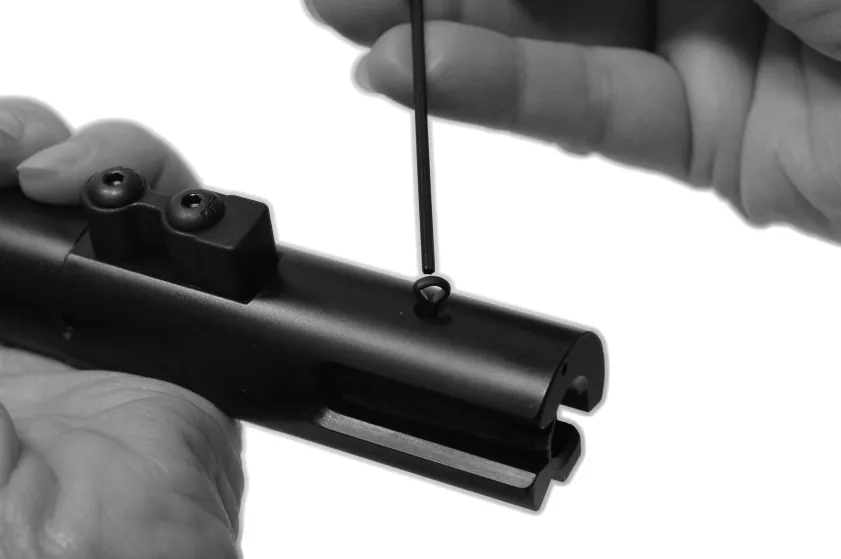 Figure 12
3.1.11 Tilt bolt face up and remove firing pin from the bolt.
3.1.12 Remove the extractor by pulling the retaining pin up and out of the bolt while applying slight pressure onto the lateral face of the extractor. (fig12)
3.1.13 Your pistol is now disassembled to the point necessary for normal required cleaning and maintenance. Do not attempt disassembly of your bolt any further than herein described,
← Previous: 2.3 Malfunctions & Failure to Fire | Complete Owner’s Manual | Next: 3.2 Cleaning & Lubrication →